Arduino Uno + Keypad 4x4 + LCD I2C
Kebutuhan hardware:
- Arduino Uno + USB kabel
- Keypad 4x4 Matrix
- LCD 16x2 I2C
- Kabel Jumper Dupont
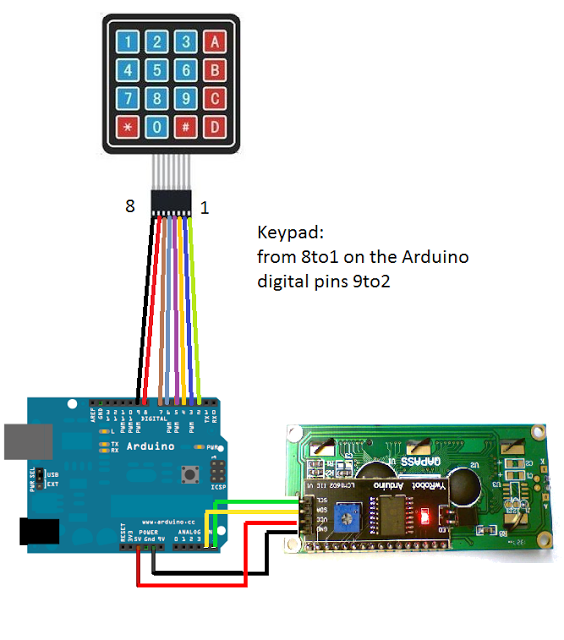
Diagram
Langkah - langkah:
- Pastikan sudah menginstall library Keypad dan LCD I2C
- Upload code berikut menggunakan Arduino IDE
#include <Keypad.h>
#include <LiquidCrystal_I2C.h>
const int ROW_NUM = 4; // four rows
const int COLUMN_NUM = 4; // four columns
char keys[ROW_NUM][COLUMN_NUM] = {
{'1','2','3', 'A'},
{'4','5','6', 'B'},
{'7','8','9', 'C'},
{'*','0','#', 'D'}
};
byte pin_rows[ROW_NUM] = {9, 8, 7, 6}; // Pin baris keypad
byte pin_column[COLUMN_NUM] = {5, 4, 3, 2}; // Pin kolom keypad
Keypad keypad = Keypad(makeKeymap(keys), pin_rows, pin_column, ROW_NUM, COLUMN_NUM );
LiquidCrystal_I2C lcd(0x27, 16, 2); // alamat I2C 0x27, 16 kolom and 2 baris LCD
int cursorColumn = 0;
void setup(){
lcd.init(); // inisialisasi LCD
lcd.backlight();
}
void loop(){
char key = keypad.getKey();
if (key) {
lcd.setCursor(cursorColumn, 0); // posisikan kursor ke (cursorColumn, 0)
lcd.print(key); // print key pada (cursorColumn, 0)
cursorColumn++; // pindah kursor ke posisi berikutnya
if(cursorColumn == 16) { // jika kolom sampai posisi akhir, clear LCD
lcd.clear();
cursorColumn = 0;
}
}
}